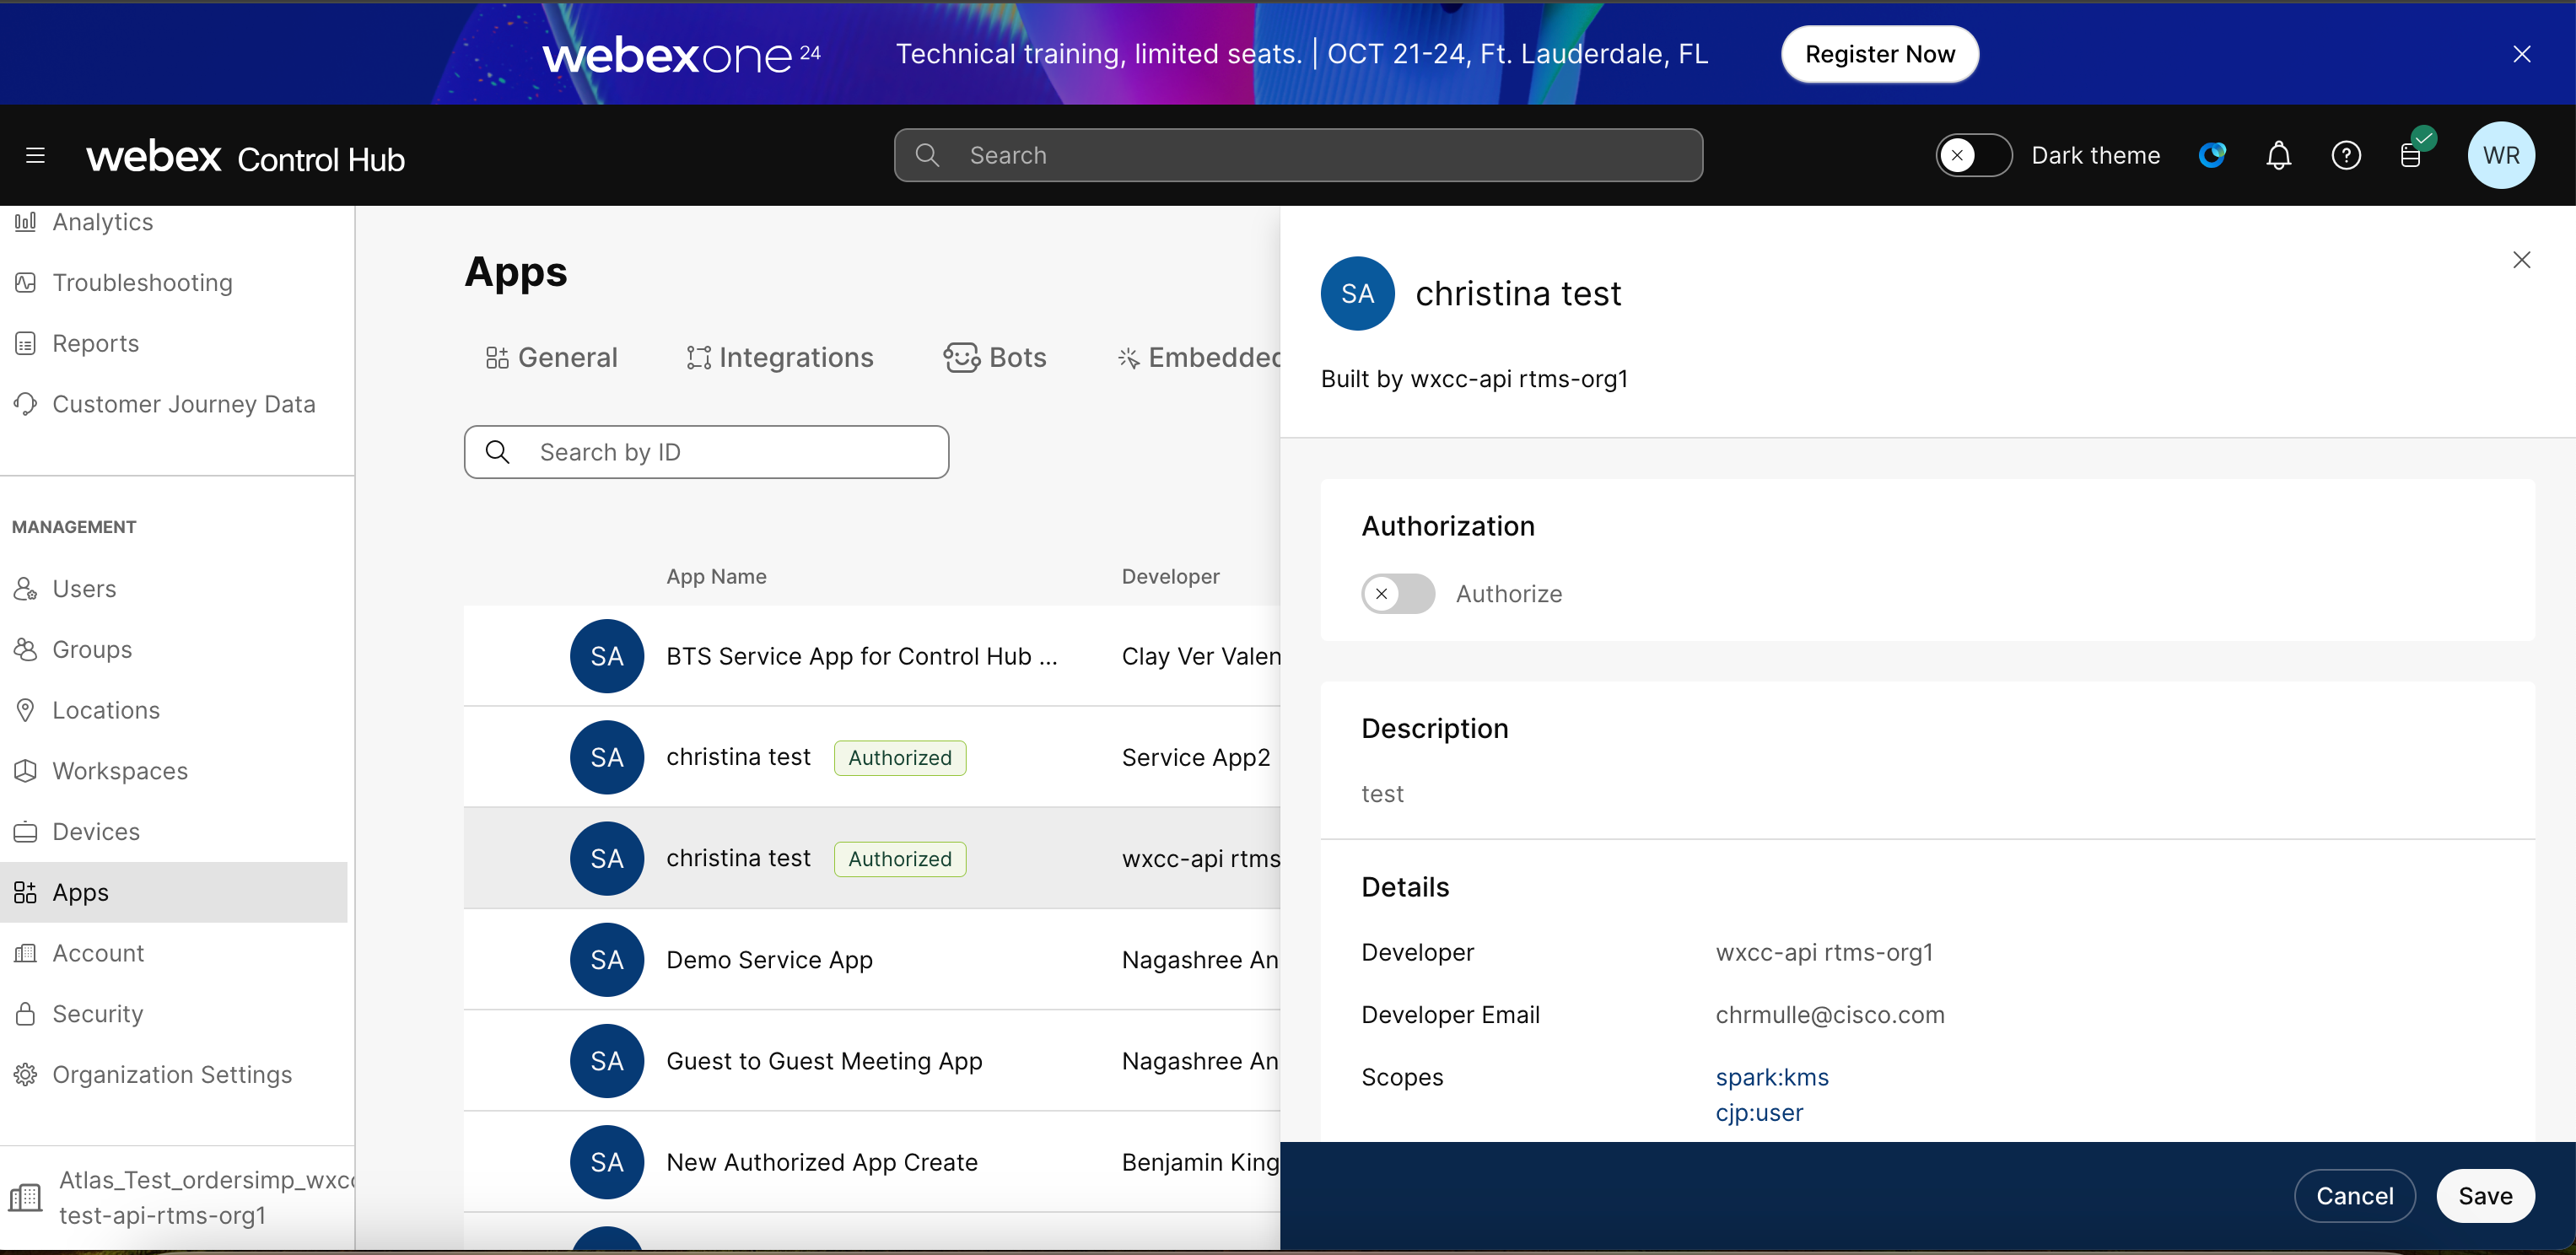
Getting Started
Service Apps
Decouple your most important business processes from individual user life cycles.
anchorIntroduction
anchorService apps enable you to request admin permission to use Webex Contact Center REST APIs, reducing dependence on a single user's authorization and mitigating any associated risks to your app. Instead, the actor for the API calls is a powerful machine account provisioned in the customer's org, ensuring your business automation flows will continue to run smoothly.

Service Apps are often used for mission-critical business processes including:
- End to end provisioning of users
- Reporting dashboards for critical quality analysis
- Onboard new Webex Contact Center users
- … and much more.
Common to such apps is that they must run continually and be independent of any single user account. In contrast, for standard Integrations, if the authorizing user leaves the company or changes passwords, the Integration may break. In addition, unlike standard Integrations, Service Apps usually request data for many users and the whole org rather than on behalf of a single user.
Service Apps do share many similarities with Integrations. The industry standard OAuth 2.0 protocol underpins both. OAuth client creation, scope selection, and authorization are happening just as they do for Integrations; however, those flows are mostly abstracted in a GUI experience for both the developer and the admins.
Two distinct personas are involved in putting a Service App into service: the developer and the full admin. Both of those workflows are described below.
anchorService App Creation: Developer Flow
anchorAs a developer, to create your Service App you need to do the following:
- Register your Service App with Webex.
- Optionally, create webhooks that notify you when a customer admin authorizes or deauthorizes your Service App.
- Request admins’ authorization (must be a Full Admin).
- Retrieve the access and the refresh token.
- Use the access token to make your API calls.
Register your Service App
As a developer, you primarily work in the Webex Contact Center Developer Portal. Registering your Service App with Webex is easy:
- Login to the Developer Portal and select My Apps from the menu under your avatar.
- At the top of the page, click Create a New App and then Create a Service App to start the wizard.
You'll need to provide basic information, like your service app’s name, description, and logo. This information should be user-facing since admins will see it on the Control Hub’s management page. You also need to select the scopes for your Service App. For more information on scopes, please see the Integrations guide.
Service App support and required administrator roles vary by API. Check the API reference for each operation your app needs before selecting scopes. Request only the scopes required for those operations so administrators can assess the access they are granting.
Register the Service App with a client secret. This creates an OAuth client, as it does for an Integration.
Things start deviating from Integrations in the top two sections on the Service App details page: Admin Authorization and Webex App Hub submissions. To understand those sections, we must first dive into the application visibility for Service Apps, which differs slightly from Integrations. When you create your Service App, initially its visibility is private. That means only you can authorize it if you also happen to be a full admin. If you are a regular user and need an admin’s help, you must follow a different process.
Client secret
After successful registration, you will be taken to a different page containing your Service App's newly created Client ID and Client Secret. The client secret is shown once, so copy it and keep it safe.

Create webhooks for your Service App
This step is optional. It lets your application learn about new authorizations without polling the developer portal.
You, the developer, must create these webhooks. Call the Create a Webhook API (POST /v1/webhooks) once for each event. A single webhook has one event, so register authorized and deauthorized as two webhooks. Webex does not create either webhook when you register the Service App. For onboarding before the first customer authorization, use an OAuth Integration to register them. Its access token needs application:webhooks_write or spark:applications_webhook_write; the API also accepts spark:all. Select the available webhook scope on that Integration and request only the access it needs. See Service App webhook registration requirements.
{
  "name": "Service App authorized",
  "targetUrl": "https://example.com/mywebhook",
  "resource": "serviceApp",
  "event": "authorized",
  "secret": "replace-with-a-strong-random-secret"
}
Repeat that request with "event": "deauthorized" if you also want revocation notices, and include a unique secret for that registration. An optional filter of id=<serviceAppId> limits events to one Service App. Store signing secrets in your server's secret manager, not in source control. When Webex POSTs an authorized or deauthorized event, verify the signature over the unmodified raw request body before processing the payload or retrieving a token. See Receive and verify webhooks and Using a Webhook Secret.
Create the webhooks before requesting authorization. When a Full Admin authorizes the Service App in Control Hub (Management > Apps > Service Apps), Webex sends an HTTP POST to your registered targetUrl. For an App Hub app, the customer's Full Admin authorizes the app; the developer registers and operates the webhook receiver. Registering the webhook does not authorize the Service App.
After verifying an authorized event, confirm that resource is serviceApp and data.id matches the Service App you expect. Use data.authorizerOrgId as targetOrgId when retrieving the customer's token pair. The top-level orgId identifies the organization that owns the webhook, which can differ from the authorizing customer's organization. Do not substitute that value or decode it to choose the customer. See the authorization webhook payload and Token retrieval via API. The event does not contain an access or refresh token.
A deauthorized event uses the same payload shape. After verifying it, mark that customer's authorization as revoked and stop using its stored tokens. The event does not create or refresh a token.
Request Authorization of a Service App Within the Developer's Org
To request authorization in your own org, click Request Admin Authorization. This action makes your Service App visible in your org’s administrative tool (Control Hub), where a Full Admin can then authorize it. If you are working in a free org (usually an unpaid account), you should request a sandbox, where you can create an admin to do the authorization.
Request Authorization of a Service App in a Non-affiliated Org
To request authorization in an org that is not your own org, you need to Submit to Webex AppHub. When you do that, a manual review of your Service App with the App Hub team is initiated. You must fill in additional information including how the App Hub team can test your app, which vertical you serve, descriptions and tags shown on App Hub, landing and support pages, videos, and more. You can find more information in this supporting blog.
If onboarding needs the customer's organization name, include spark-admin:organizations_read in the Service App's scopes before App Hub submission. After authorization, use that organization's Service App access token and Get Organization Details to read its basic details. A serviceApp authorization webhook provides data.authorizerOrgId, not the organization name. Otherwise, omit this scope to follow the App Hub guidance to request only necessary scopes.
Retrieve the Access and Refresh the Token Pair
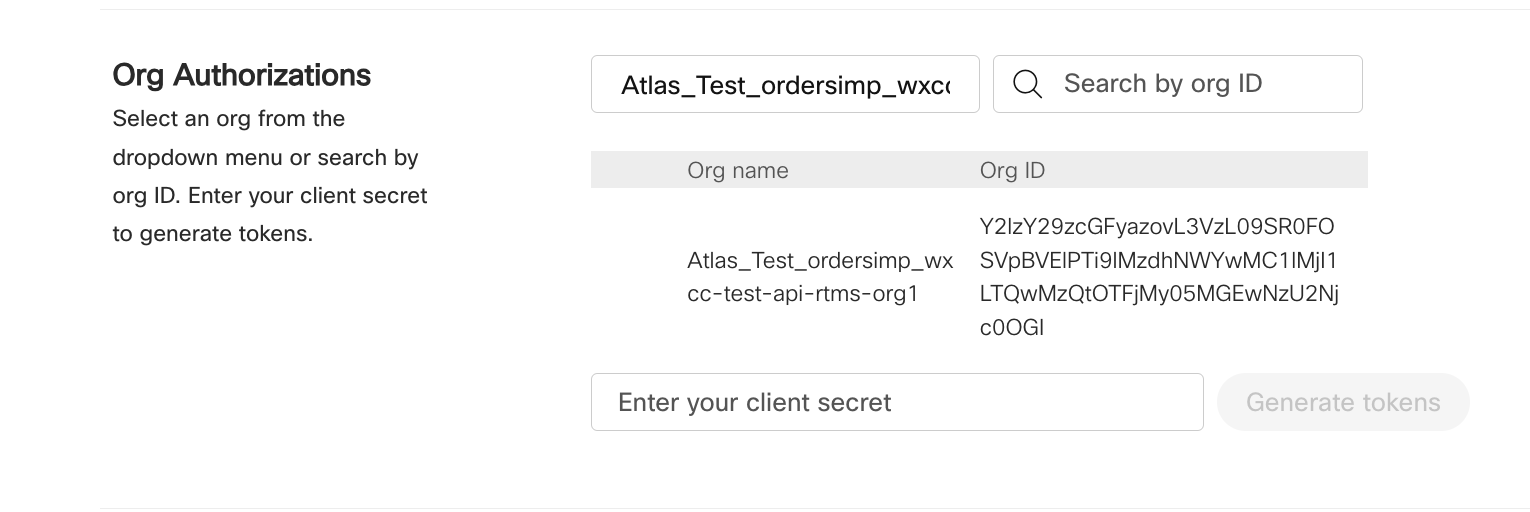
After your Service App is authorized, you can retrieve the access and refresh token pair for that organization. Use the returned expires_in and refresh_token_expires_in values to manage token expiration instead of assuming fixed lifetimes. To get the token pair, go to the Org Authorizations section on your Service Apps details page. There is a drop-down list for all the orgs that authorized your Service App. You can also search by Org Id if you know the org ID and have many authorizations.
Note: Searching by name is not currently supported.
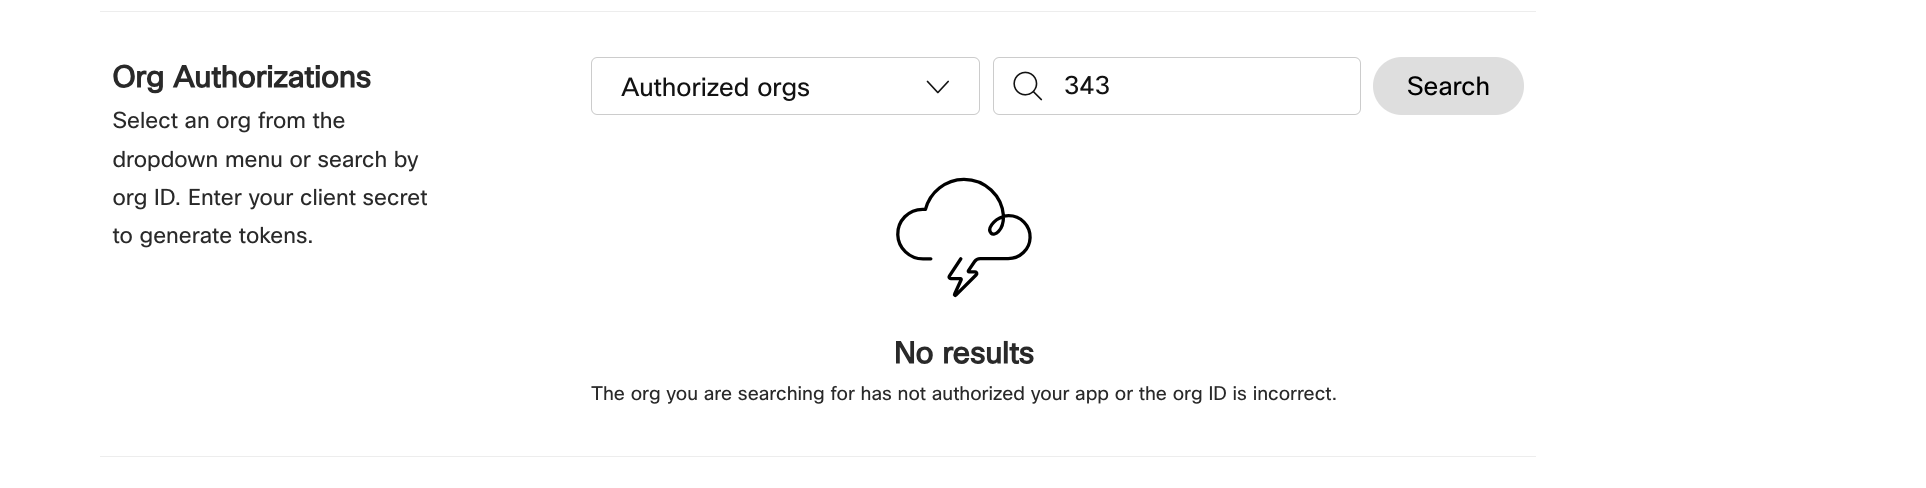
If an org is not found by the provided Org Id used to search the list for all the authorized orgs, you will see the following error.
Client secret
Once you have identified and selected the new org’s authorization, you can copy your client secret into the provided field and retrieve and copy the access and refresh tokens for the org. If you didn’t store the client's secret previously, you can regenerate it.

If you see an error like the following, your secret may not have been copied correctly to the clipboard. Manually select it from the field and try again.
If token retrieval reports a scope-related error, review the scopes requested by the Service App and keep only those required by your API operations. Check the returned error details before retrying; a token request can also fail because of credentials, permissions, or missing authorization.

Token retrieval via API
You can retrieve the organization token pair by calling the applications token endpoint. For automation, authorize the call with a separate OAuth Integration's access token that has the spark:applications_token scope. Send Content-Type: application/json. The returned access token and refresh token represent the organization machine account. The request below requires a client-secret Service App. For webhook-driven onboarding, pass data.authorizerOrgId unchanged as targetOrgId.
Request a token with a client secret
Supply clientId, clientSecret, and targetOrgId:
POST /v1/applications/YOUR_SERVICE_APP_ID/token HTTP/1.1
Host: webexapis.com
Authorization: Bearer <INTEGRATION_ACCESS_TOKEN>
Content-Type: application/json

{
  "clientId": "YOUR_SERVICE_APP_CLIENT_ID",
  "clientSecret": "YOUR_SERVICE_APP_CLIENT_SECRET",
  "targetOrgId": "CUSTOMER_ORGANIZATION_ID"
}
Replace the placeholders on your server with the matching credentials and organization ID. Store the returned token pair securely, separately for each customer organization. Never expose client secrets or tokens in browser code or logs.
The Service App must already be authorized for that organization. A 401 response indicates an authentication failure; check the credentials and whether the customer's authorization is still current. Check the returned error message, Integration token's scope, Service App credentials, and customer's current authorization before retrying. A 403 can indicate insufficient permissions or that the customer has not authorized the Service App. If the error says the app changed after authorization, have the customer's admin review and authorize the current app configuration. Calling the token endpoint does not authorize the app.
Use the Access and Refresh Tokens to Make API Calls on Behalf of the Machine Account
Refresh access with the Service App's client secret. Store the new access token and any replacement refresh token returned by the service.
anchorService App Creation: Admin Flow
anchorYou have the following responsibilities as an admin who wants to use a Service App:
- Be a Full Admin (read-only, device admins, etc., are insufficient).
- Understand the purpose of the Service App, the developer's background, the scopes you are authorizing, and how your organization will use it.
- Authorize the Service App for use in your org.
Full Admin Authorization of a Service App
To authorize a service app:
- Log in to your organization's Control Hub (https://admin.webex.com).
- Find the Service App you want to authorize. Service Apps can be found under Management > Apps > Service Apps. If you cannot see the Service App in question, you need to ask the developer to have them submit for Admin Authorization or App Hub submission You can click the Service App and will see the service app’s description, developer info, and requested scopes.
- When ready to authorize the Service App, click Authorize followed by Save. Your name is shown as the authorizing user in Control Hub. An entry in AdminAudit events is also created, documenting who authorized the Service App.
- Optionally, you may also wish to inform the developer that you have authorized their Service App.

Deauthorizing a Service App
Any full admin in Control Hub can deauthorize a Service App. This often happens because an app is no longer needed or because of security concerns.
To deauthorize a Service App:
- Go to Management > Apps > Service Apps and highlight the Service App. Uncheck the authorized checkbox and then click Save.
- The machine account created during authorization is deleted, and the tokens are invalidated.